
Share on
In this guide, we’ll learn to automate build, test, and deploy applications to the Ubuntu Server with minimal setup along with concepts of Continuos integration, Continuous delivery, and Continuos deployment.
This article will cover basic to advance processes in a fairly simple manner. We will automate Django deployment as an example.
Let’s learn the concepts first.
What is DevOps?
We all have heard this subject many times in life especially if you are working as a software developer. In earlier days, Operations teams and Developers has to cooperatively work together to deliver products which created a waiting time to get feedback. DevOps is a combination of both roles to achieve the same business objective with automation.
There are three major phases to consider while creating CI/CDs;
Continues Integration
Continues Integration (CI) is the process where the test cases, build files are executed every time changes are detected in the codebase. This is one of the best practices in the Agile software development life cycle to know early risks. The failed builds are notified to the developer instantly.
This process can be done in two different ways in Git.
-
You can manually set up Git hook
post-receive. You can check my previous post to learn more on the topic. -
Use Git webhooks, both are invoked when doing git push and updates. I assume that your code is already hosted in Github, we’ll use GitHub webhooks to connect Jenkins.
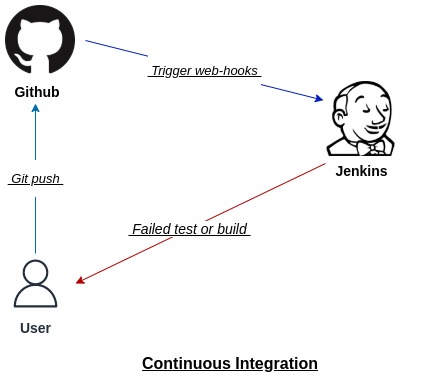
The idea is to trigger scripts to auto-run tests, build files whenever a change is detected in the Github repository branch as shown in the above image. If a build is failed you can notify dev teams through standard emails or directly post on social platforms like Slack, through plugins.
Continuos Delivery and deployment
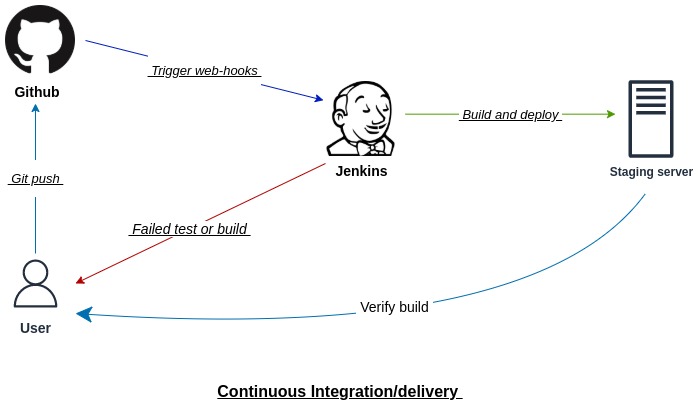
Continuous Delivery (CD) resumes from Continues Integration process, test/builds are verified and deployed to test or staging server as shown in the image above, generally manual/automate browser level tests are carried out by the QA/users at this stage. Smoke tests are done to ensure whether a software feature or bug build that has been delivered is stable.
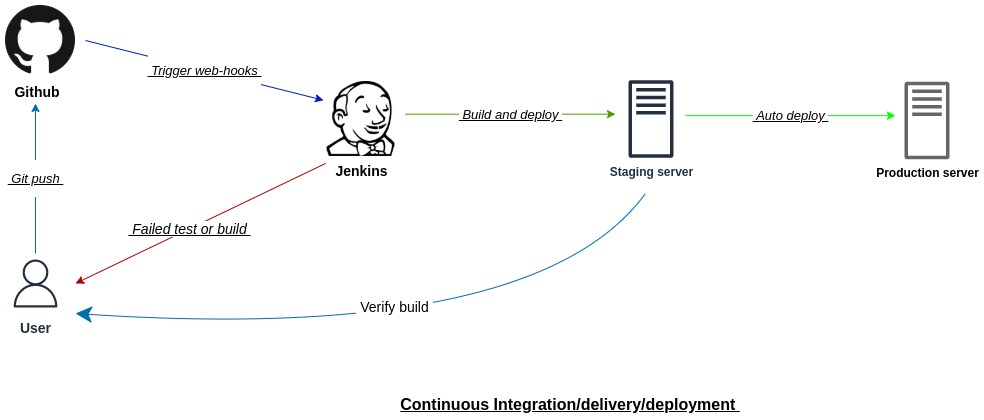
We’ll not cover much about Continuous Deployment (CD) in this guide but the idea is pretty straightforward; once the users (usually a client or beta users) test the build and no bugs are reported, the same code is pushed to the production server.
Git flow
├── Git
    └── Branches
        └── `Others`
            └── Create branch from `develop`
                └── Changes detected/Git webhook triggered to run Continuos integration if enabled
              └── Create merge request to 'develop' [manual process]

        └── `Develop`
             └── Changes detected/Git webhook triggered
                └── Run Continuos integration
                └── Run Continuos delivery to `staging server`
              └── Create merge request to 'master' [manual process]

        └── `Master/main`
             └── Changes detected/Git webhook triggered
             └── Auto-run Continuos deployment to `production server`
Here is one of the simple ways to visualize how the distributed version control system is structured to handle each cycle.
Jenkins
It is an open-source automation tool to automate build, test, and deploy projects. This is all in one DevOps server that has to be installed manually and written in Java, which has many plugins to make automation smooth.
Configure Jenkins
It is recommended to create new server or instance for Jenkins only which will be the
masterserver.
Let’s install Jenkins on Ubuntu20 LTS. Jenkins requires Java and JDK in order to compile Java code. There is Open Java Development Kit (OpenJDK) that we will be using since it required no license for production uses.
Firstly, update the Ubuntu packages using;
sudo apt update && apt upgrade -y
1. Install OpenJDK
sudo apt install openjdk-11-jdk -y
2. Instal the latest version of Jenkins and enable it when server restarts
wget -q -O - https://pkg.jenkins.io/debian-stable/jenkins.io.key | sudo apt-key add -
sudo sh -c 'echo deb http://pkg.jenkins.io/debian-stable binary/ > /etc/apt/sources.list.d/jenkins.list'
sudo apt update && sudo apt install jenkins
sudo systemctl start jenkins && sudo systemctl enable jenkins
At last verify if it’s running using;
sudo systemctl status jenkins
3. Enable Port
By default, Jenkins runs on port 8080. You won’t be able to access it unless you enable the port 8080 from inbound ports settings.
If you are not using firewall. Enable the port using;
sudo ufw enable
sudo ufw allow OpenSSH
sudo ufw allow 8080
Hint: If you are using AWS cloud service, it is recommended to open inbound port directly from AWS security groups for any IP address.
You should be able to visit the default jenkins URL http://YOUR_DOMAIN_OR_IP:8080/ and configure further.
Hint: if your browser cant open Jenkins at this point, double check if port 8080 is enabled.
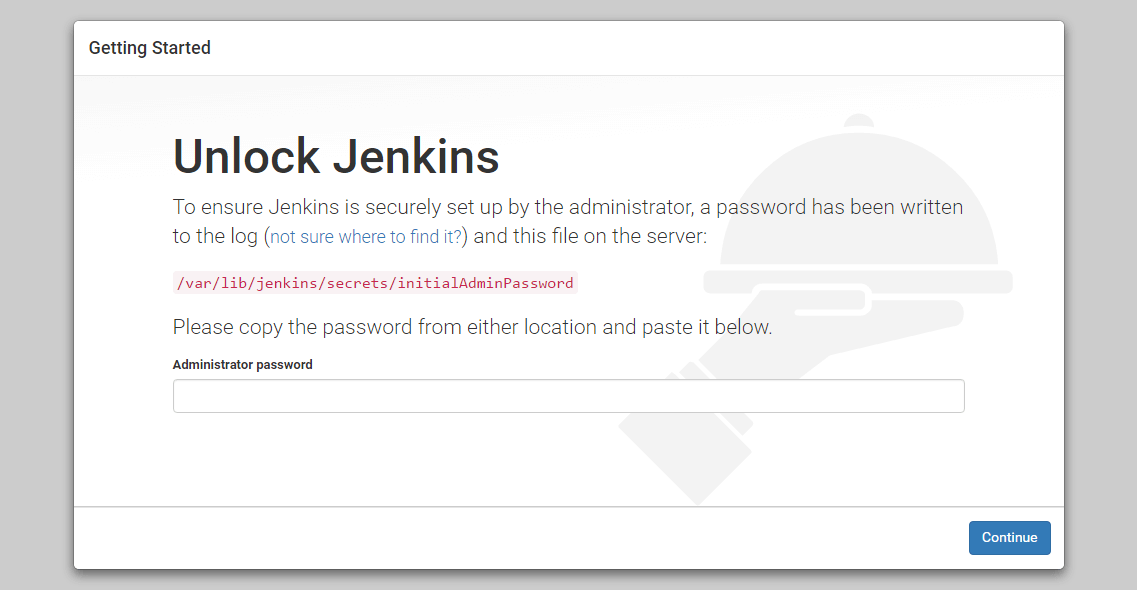
Similarly, copy and paste the default password from sudo cat /var/lib/jenkins/secrets/initialAdminPassword to unlock Jenkins.
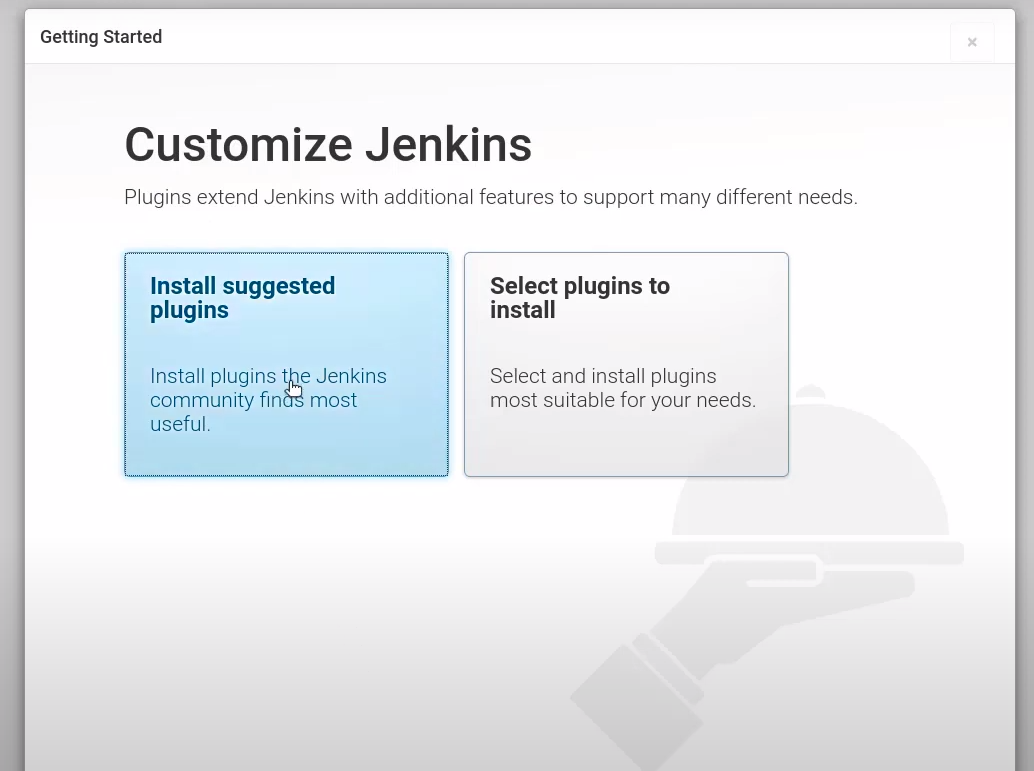
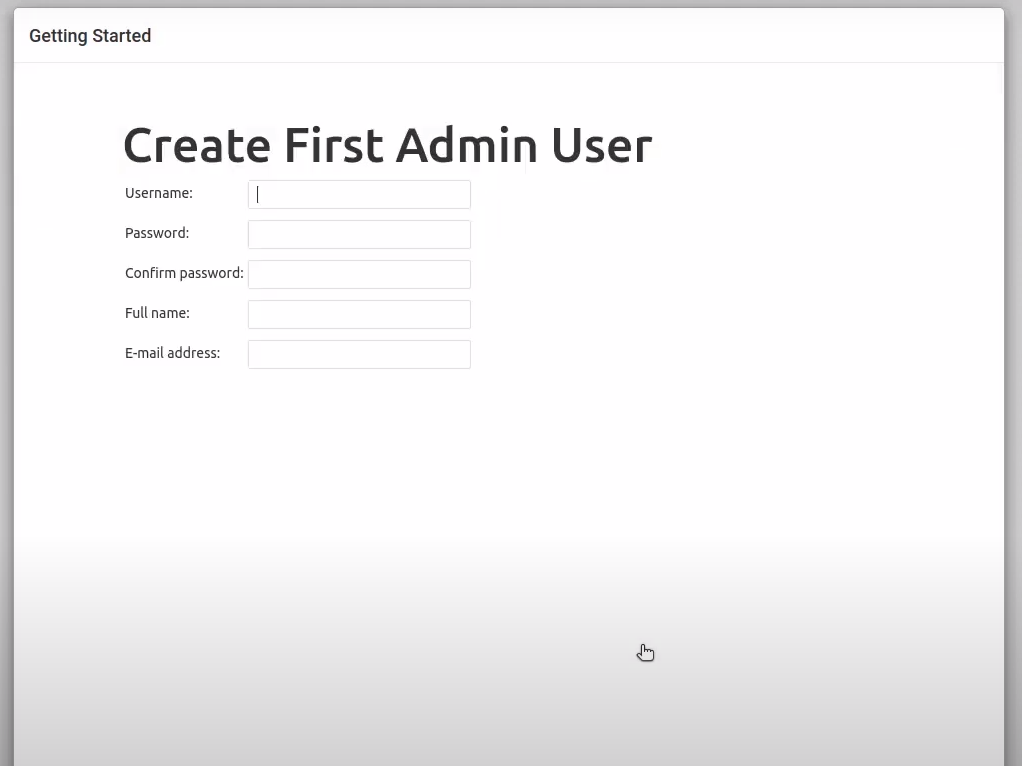
Next, simply select install suggested plugins and create a new username and password in order to log in.
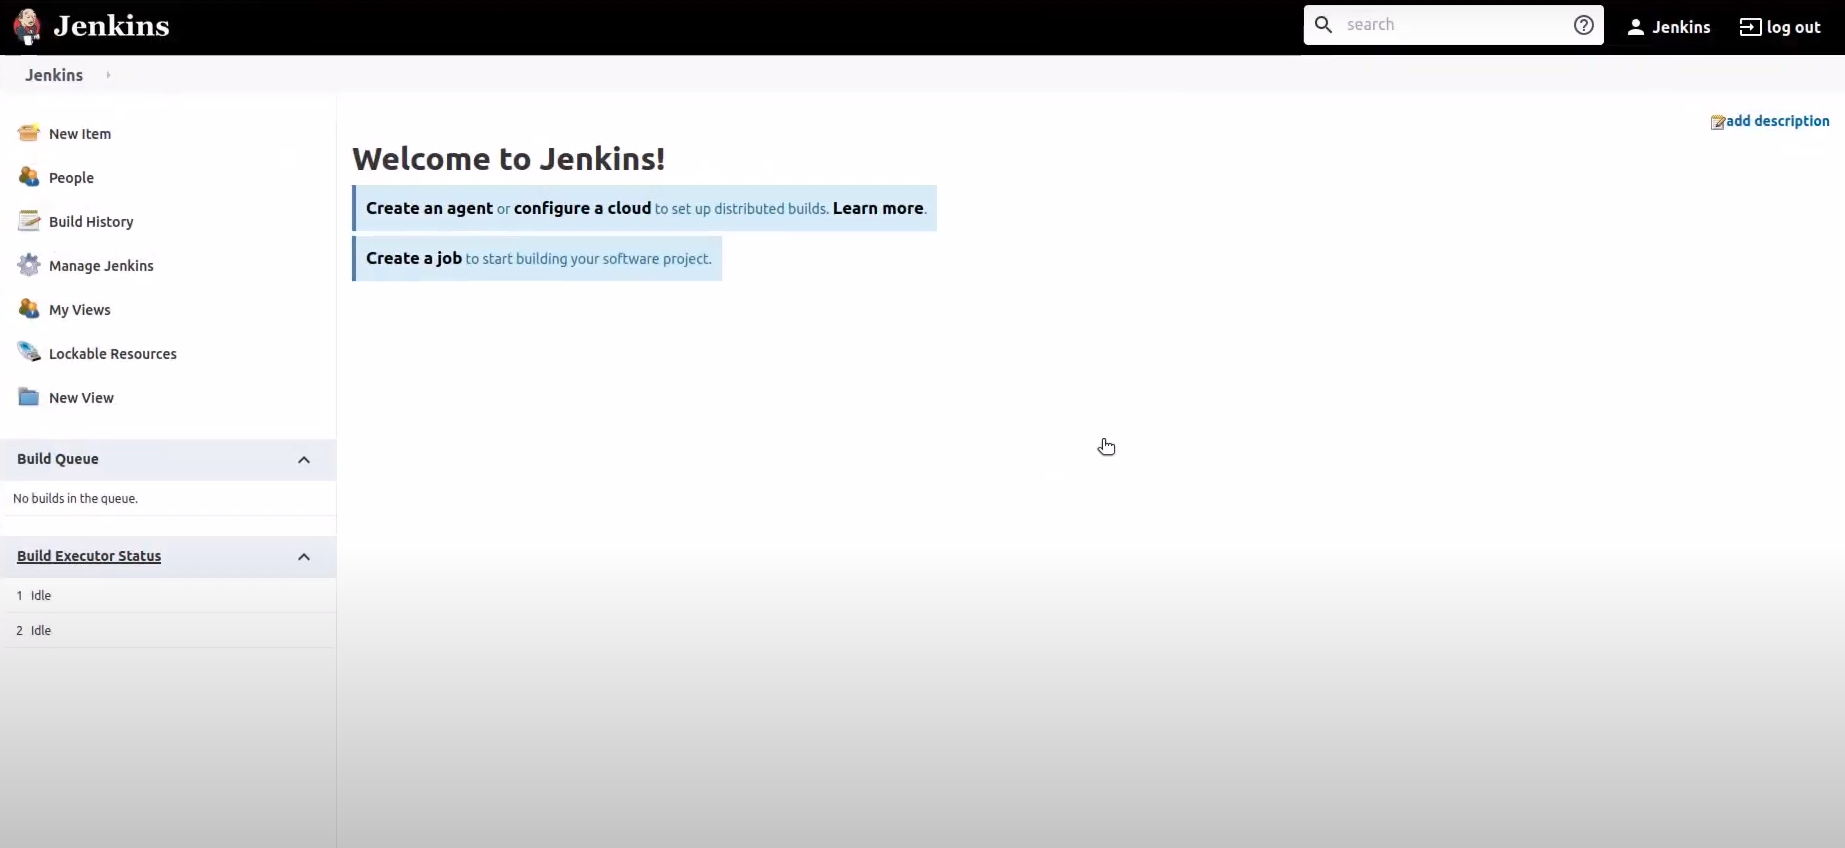
The dashboard looks something like this after the first install. Yay! we have successfully configured and installed Jenkins.
Credentials
Connect GitHub and Jenkins
We’ll create new SSH keys with sudo ssh-keygen command in the server - I will name the key as github-key. If you navigate to cd ~/.ssh you will be able to see a list of keys. View the private key with cat github-key and copy.
Note: The public key is used for encryption whereas private key is used for decryption process.
Next, we add private and public keys.
1. Public key

Navigate to Github settings and add public SSH keys i.e.github-key.pub. This will give access to your Jenkins to pull latest changes.
2. Private key
The private keys are used for the decryption process so they must be securely stored in any environment. This is required for jenkins to pull from Github and push to the remote server.
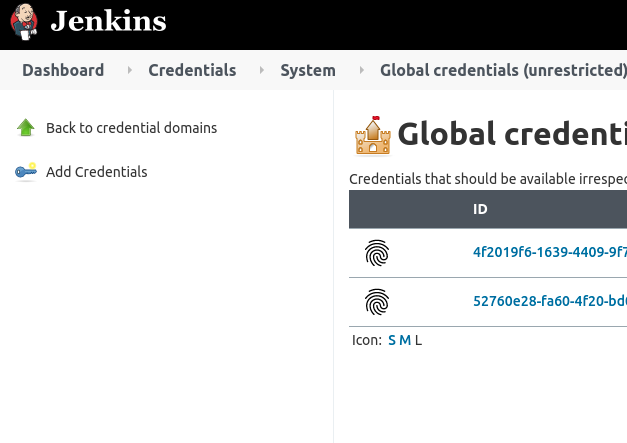
Go to Manage Jenkins > Manage Credentials > click (global). You will see two credentials that I already added before on the right-hand side.
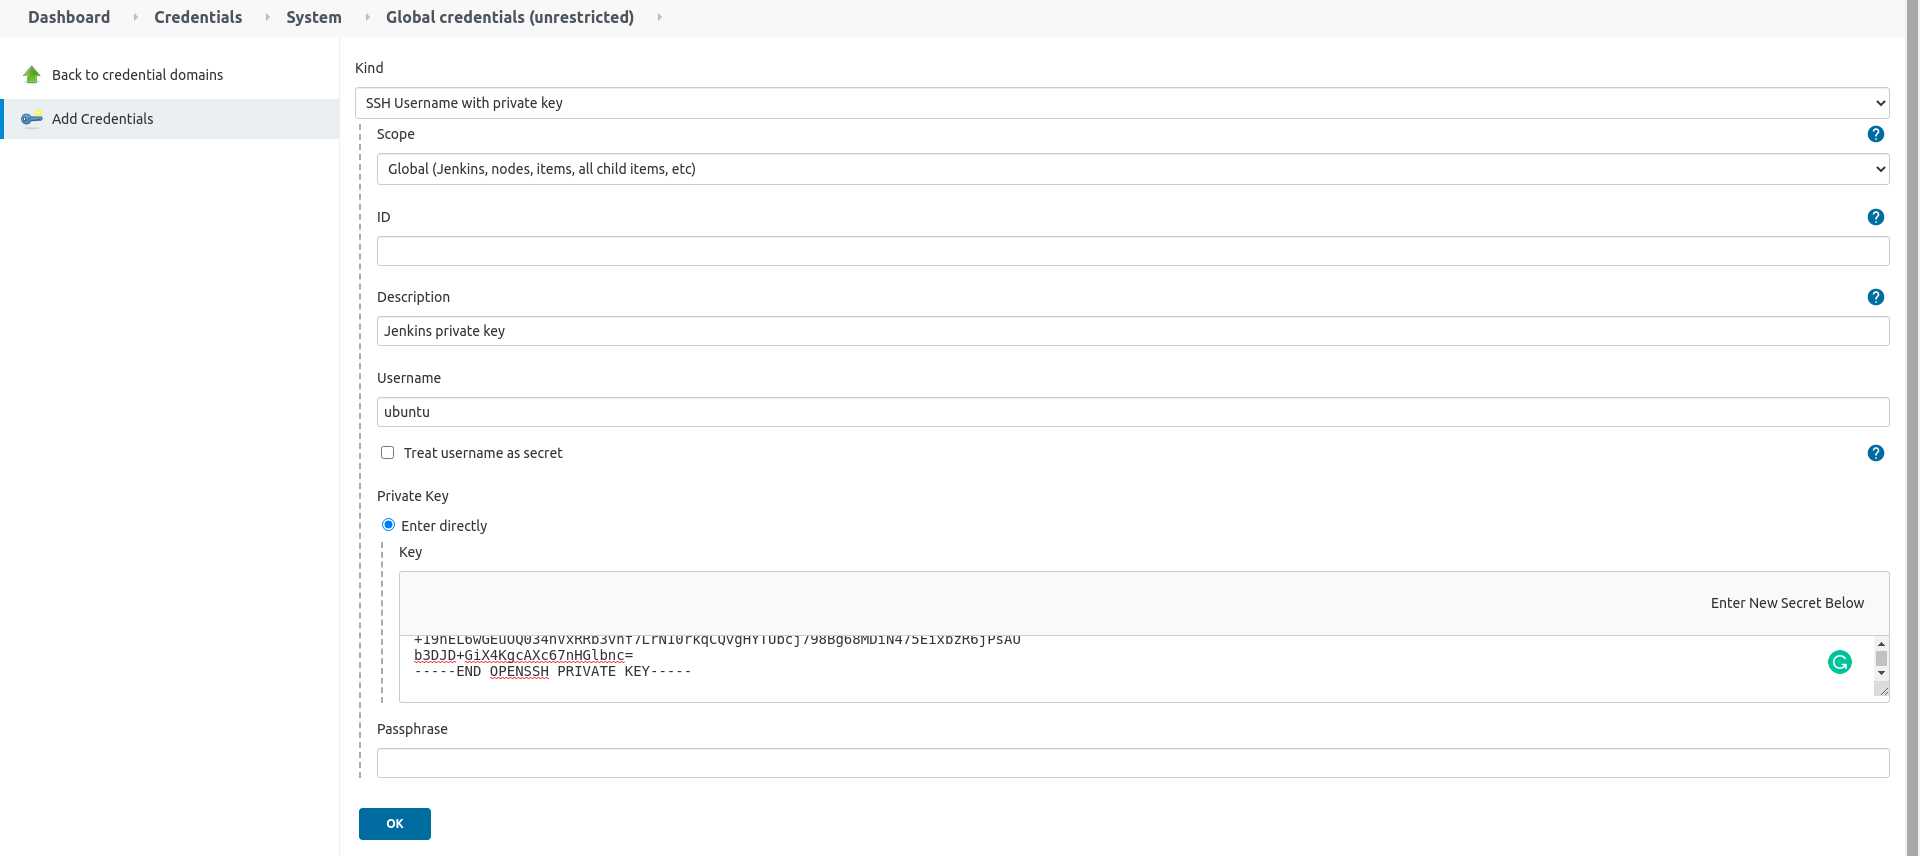
At last, click Add credentials, select SSH Username with private key as kind, add server username (can be any name) and private keys (github-key) as shown in the image.
Connect Server and Jenkins
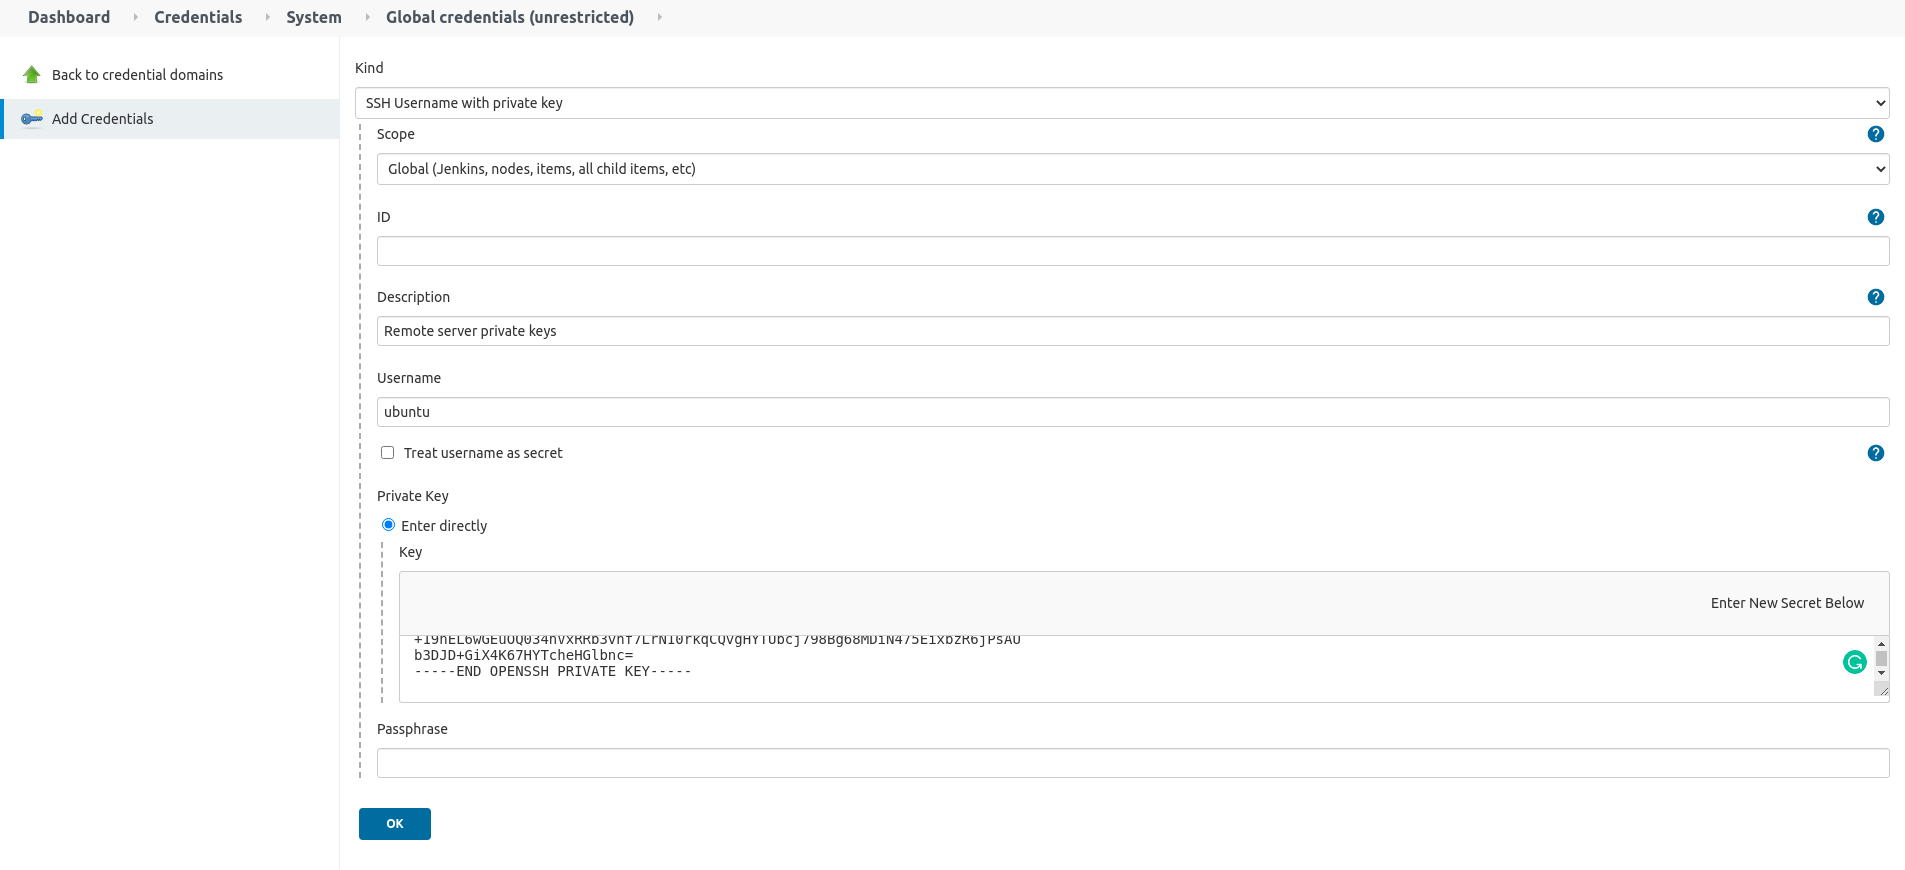
Jenkins will connect to the remote server for deployment which consists of build, run unit tests and deploy - we’ll use server private keys and SSH. Simply, add the server private key to connect Jenkins and remote server.
Note: The private key is not same the as that we created here. The server private key is given when the instance is first created and usually named id_rsa.
Github repository Webhooks
Let’s create a basic private repository in GitHub and navigate to Webhooks section from settings. This process is vital since Jenkins will be only triggered through webhooks according to our previous configuration.
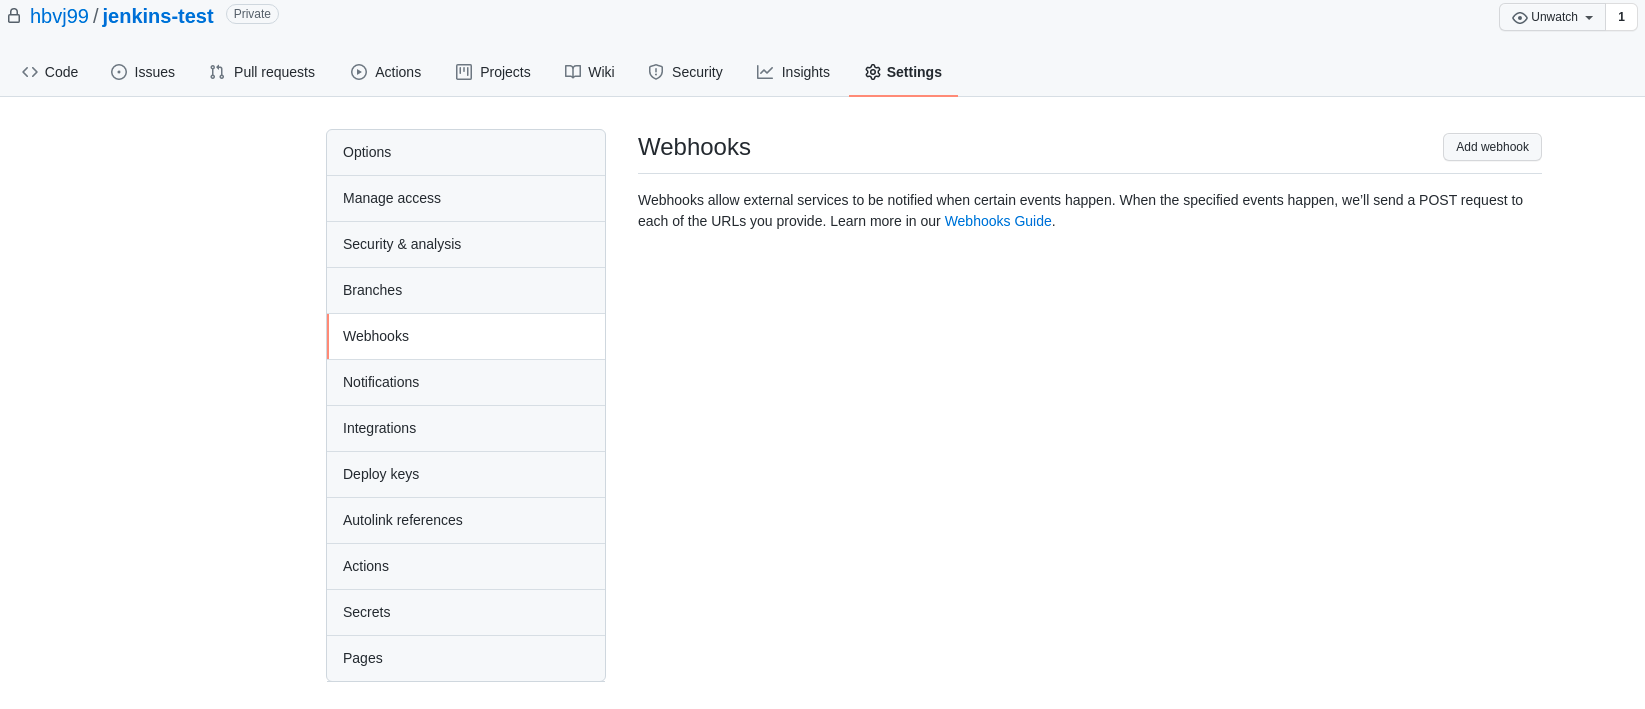
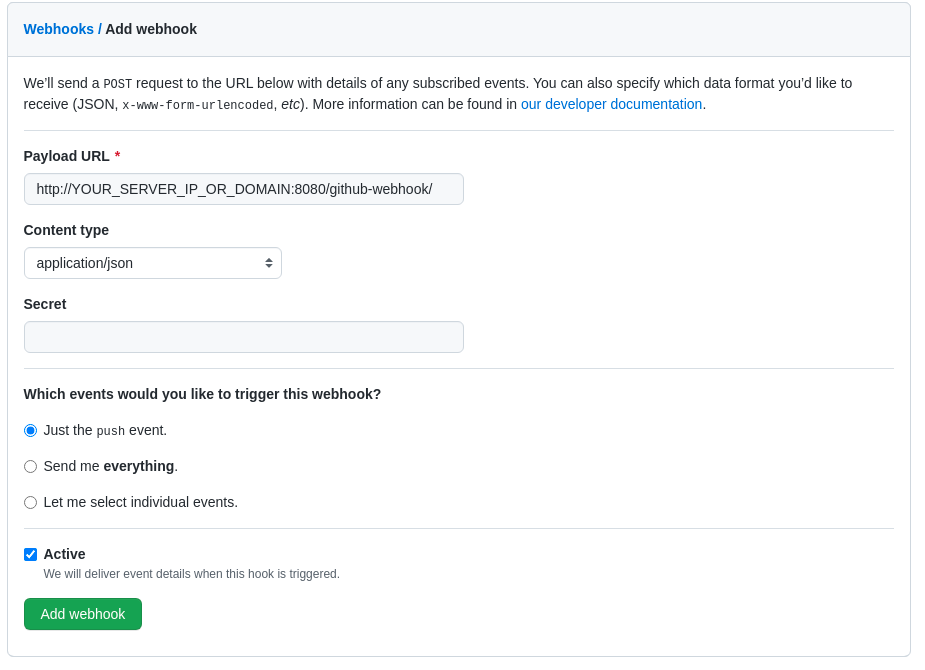
Click add webhooks, and provide the webhook URL.
Note: You need to replace the YOUR_SERVER_IP_OR_DOMAIN according to your instance configs.
Great! At this point, we are done with adding the credentials required for server authentication. Let’s summarize what we have done so far; we understand the basics of CI/CDs, configure Jenkins, connect remote server and GitHub with SSH, and configured webhooks. I know it’s lots of things to take at all, but trust be everything will make sense when automation is created.
Setup first build job
In Jenkins there are different ways to create a job, we’ll choose the Freestyle project. Jenkins cannot push changes to the remote server by default. Go to Manage Jenkins > Manage Plugins > Available, search and install SSH plugin and restart the server. This is essential to run bash commands.
Next, we need to link private keys that were added earlier to the server IP Address.
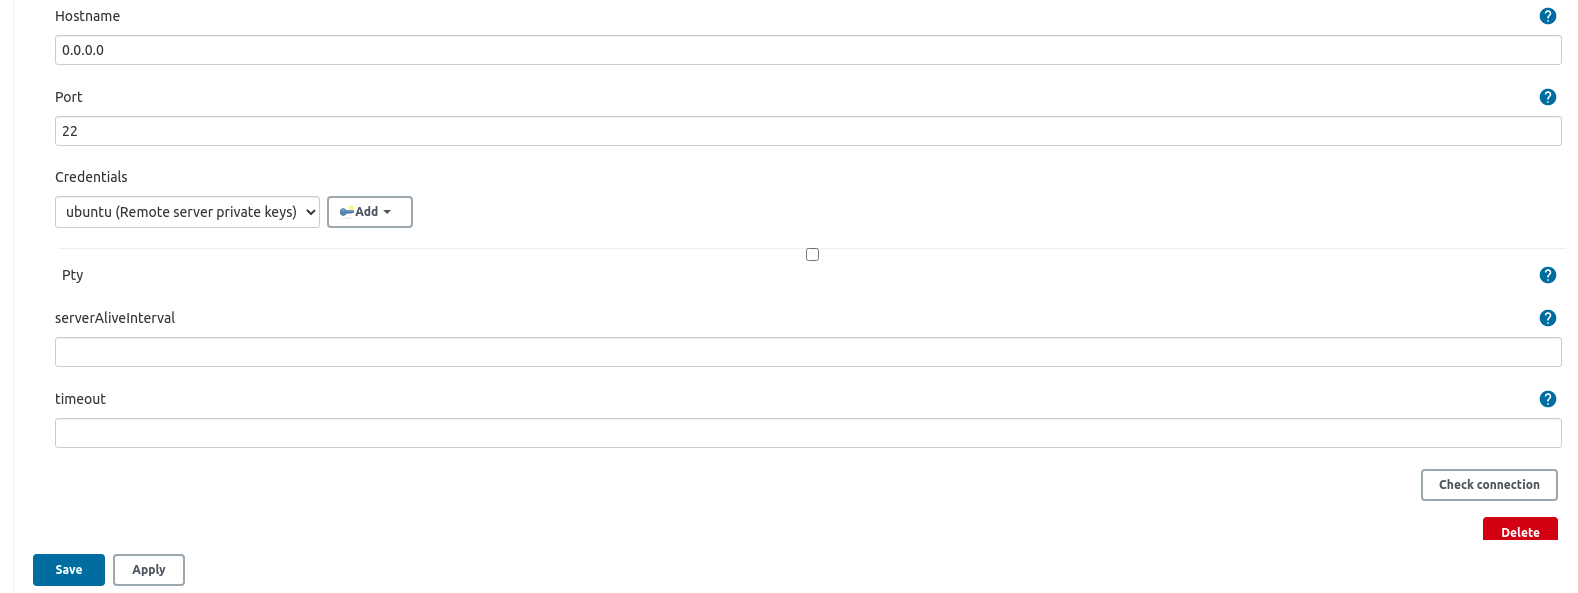
Go to Manage Jenkins > Configure System > search for SSH remote hosts and click add button located at the bottom section. You need to select Hostname (IP address), a port which is usually 22, and private key of the remote server where we are deploying.
Configure build
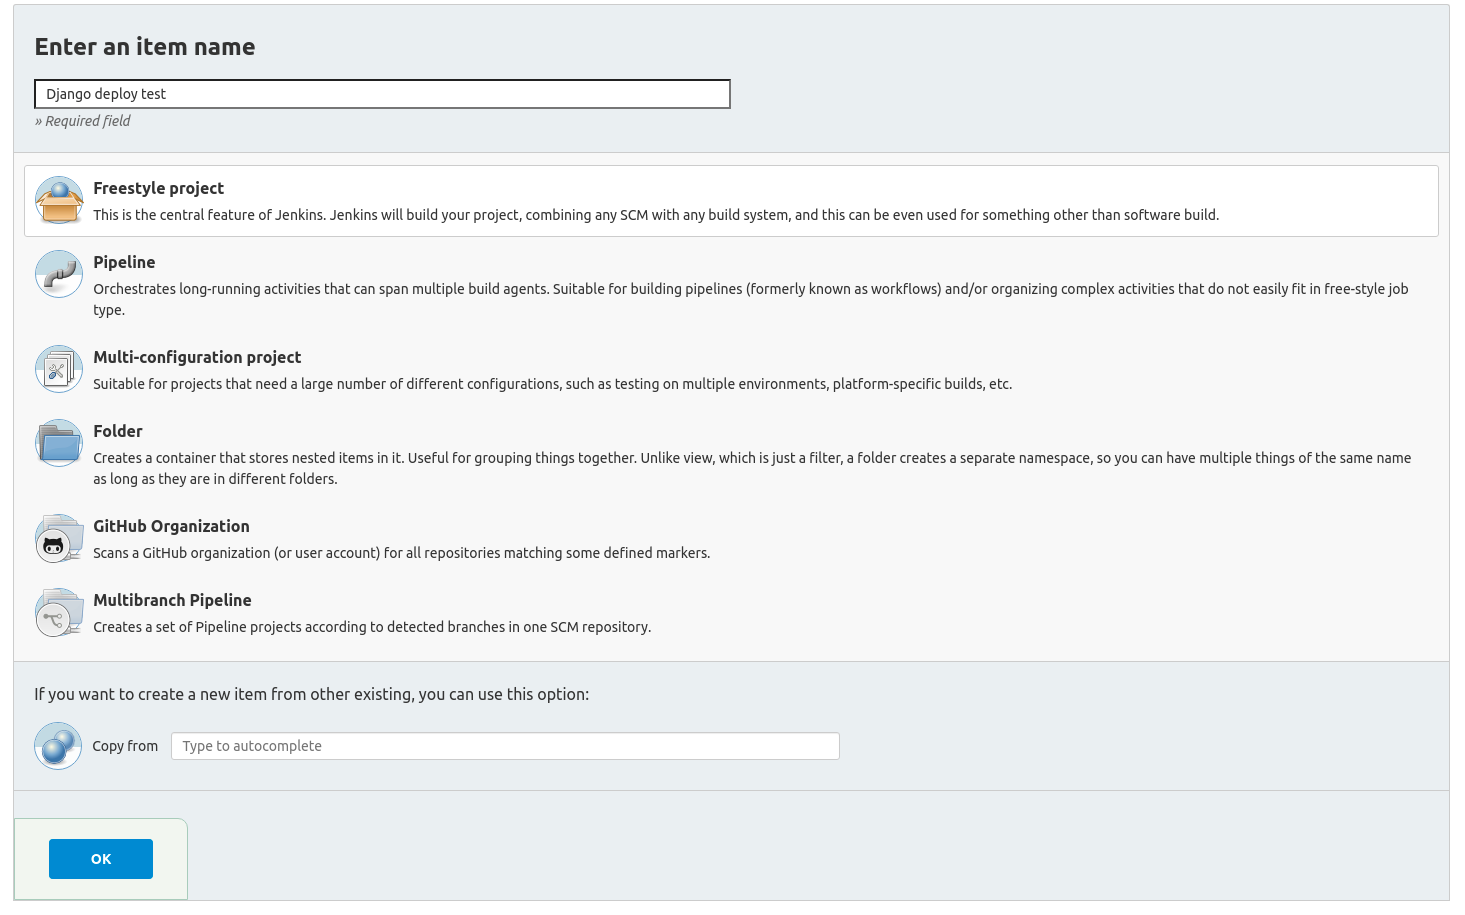
We will create a normal Freestyle project to configure automation and hit OK.
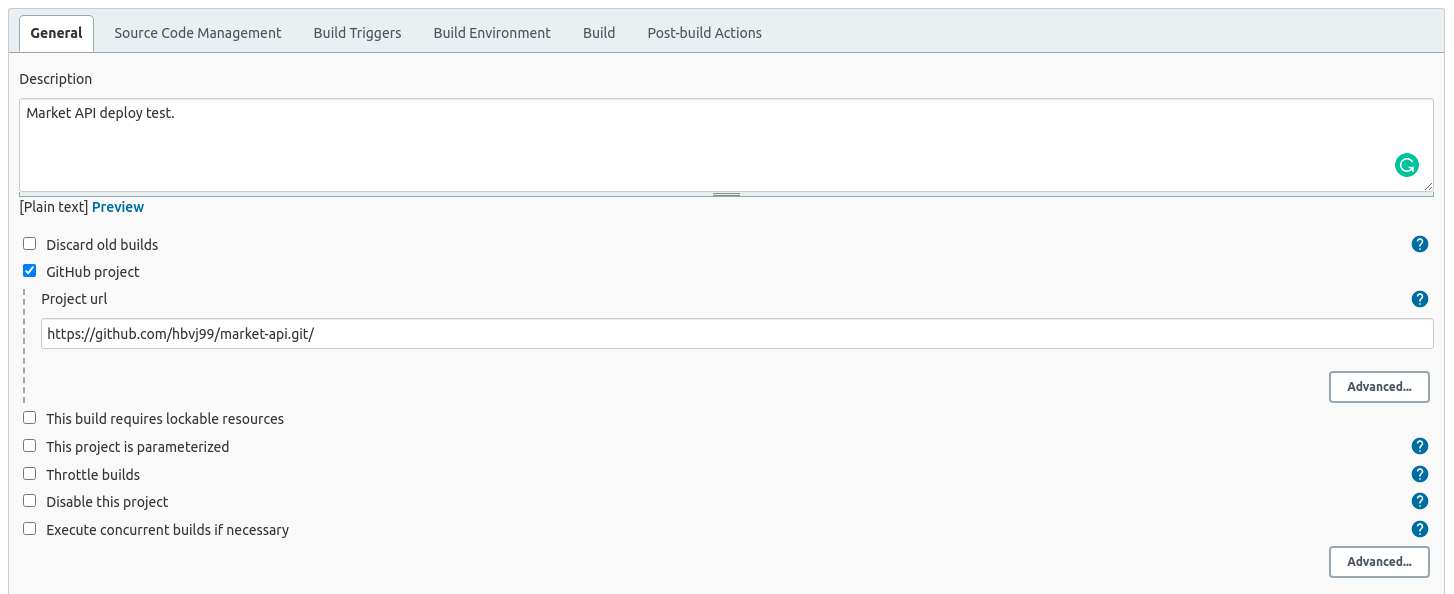
In the next page, tick the project as GitHub project, copy the HTTPs url, and add some description to your project.
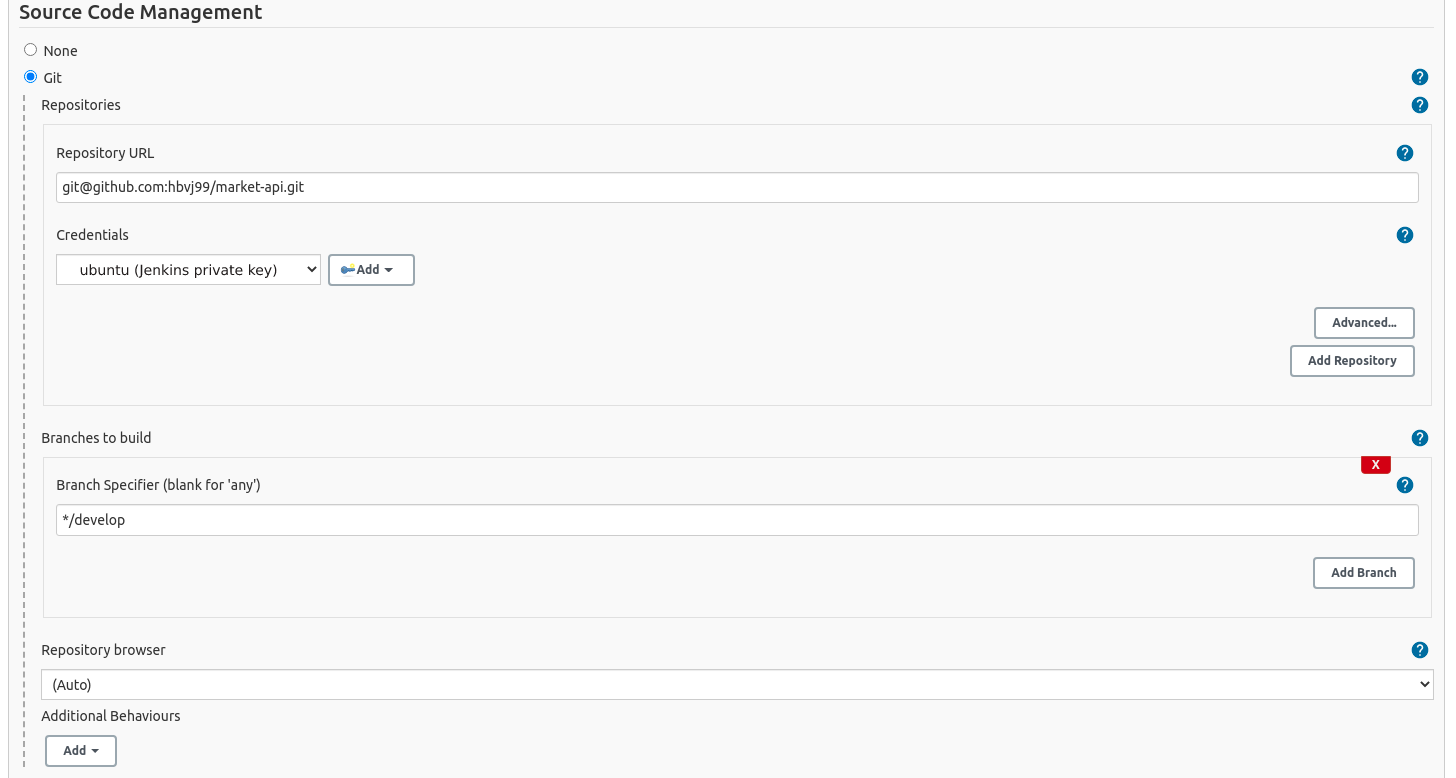
In the source code management section, add repository SSH url and the Github private key we created here. I choose develop as the build branch, leave blank for any branches.
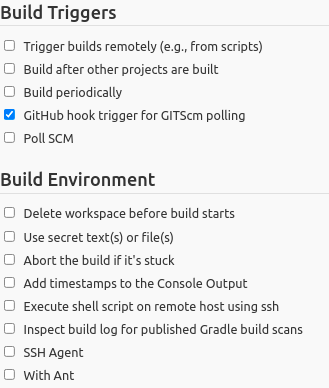
In the Build Triggers section, I will choose GitHub hook trigger for GITScm polling so that builds are triggered instantly when new code is pushed to Github. If you want to run the build after a certain time frame - Poll SCM can do it with Cron job syntax.
There are two different ways to execute commands in a remote server from Jenkins where we build, test and deploy an application. They do the same thing in different ways.
1. Execute shell script using SSH
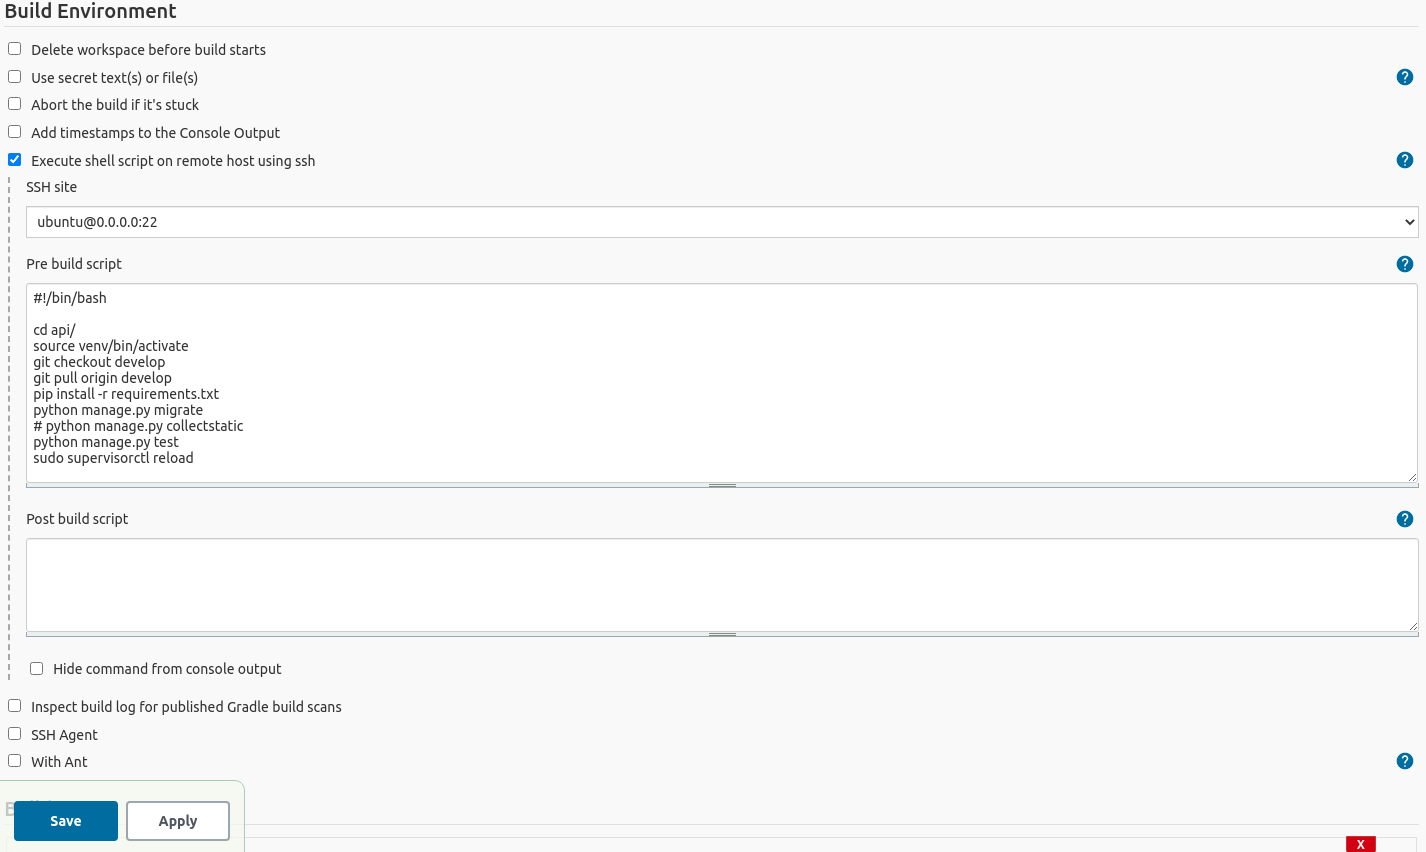
In the build environment section, click Execute shell script on a remote host using ssh option and select the private key we added earlier from global configurations.
Note: I showed the dummy ip as 0.0.0.0, this will be your remote server IP address.
#!/bin/bash

cd api/
source venv/bin/activate
git checkout develop
git pull origin develop
pip install -r requirements.txt
python manage.py migrate
# python manage.py collectstatic
python manage.py test
sudo supervisorctl reload
Likewise, above is the sample Django application deployment shell script added in pre-build-script section to execute different commands for automation. You may modify it as your choice but for simplicity, we’ll keep it short for this guide.
Test build
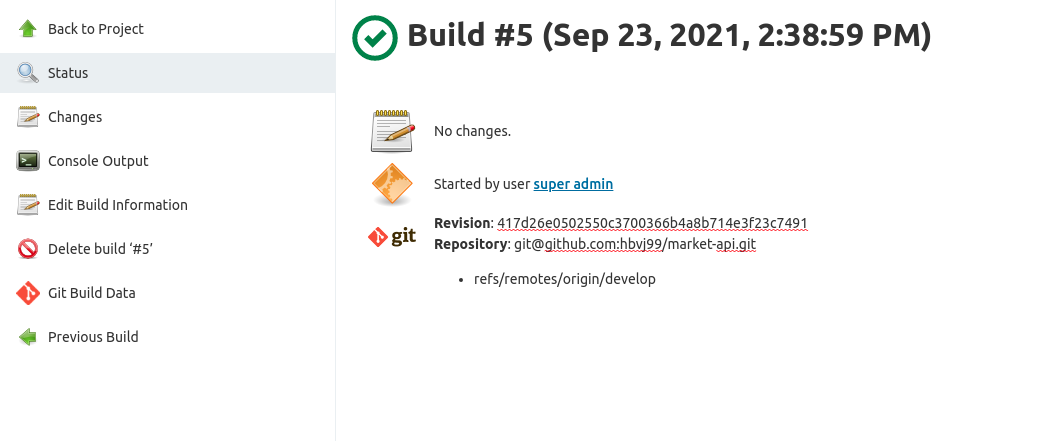
Let’s push one change to the develop branch and wait for the auto-build, test, and deploy process. The build is completed as you can see in the image above.
2. Jenkins Pipelines
This is more mature and suitable for production uses. Each phase is called pipe or stage where one certain task or command is executed and the collection of such tasks is called pipelines. It is similar to running bash script but can organize complex activities effectively.
This guide will not cover in-depth for pipelines but you can have an idea from here.
The pipeline project has to be selected while creating a new job, and you need to write pipeline scripts to execute the same bash script commands in stages.
You can learn more about Jenkins pipelines here. Here’s one sample pipeline script;
pipeline {
    agent any
    stages {
        stage('Connect server') {
            steps {
                // connect server
                sshagent(['522v0e28-ffe0-4f20-bd0f-d7ef7834r38d7']) { // jenkins credential ID
                  sh '''#!/bin/bash
                    // test connect server status
                    '''
				        }
            }
        }
    }
        stage('Build and Test') {
            steps {
                // start build and run unit test cases
            }
        }
        stage('Deploy') {
            steps {
                // deploy changes
            }
        }
}
SSH agent plugin is required to connect the remote server with pipelines. The SSH agent will take credential ID as the first parameter for authenticating the remote server.
Moreover, you can also notify the team with email using post-build-action and by selecting when any builds pass or fails.
Test build
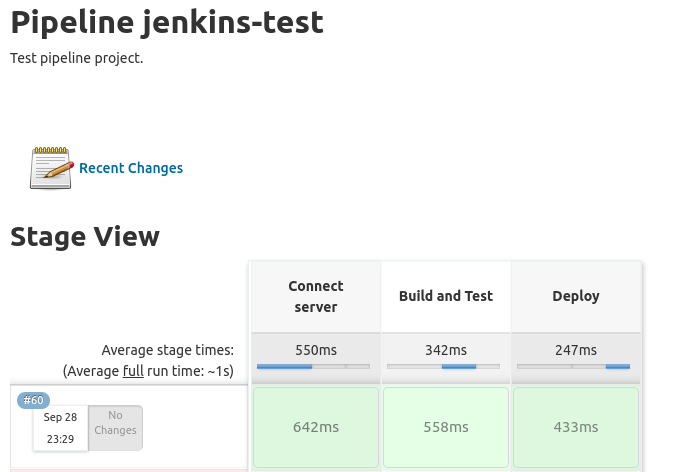
After successfully build you will see the changes in Pipelines structure.
Final thoughts
We learned to automate deployment with Continuous interaction and continuous delivery from scratch. Let’s summarize what we have learned so far. We understand the basics of CI/CDs, configure Jenkins, connect remote server and GitHub with SSH and configured webhooks, learned about credentials and how they work, and finally automate deploy to the server by running bash script and pipelines using CI/CD.
If you would like to see similar articles related to DevOps or you face any issues, don’t forget to add comments.
Leave a comment