
Share on
A hard day in my work taught me to be extra careful when storing private key pairs and not to lose or replace them accidentally. This can be really frustrating situation and I feel like my experience can help someone someday. Luckily if you lose access to your private key or somehow it got replaced, this guide is for you and can be restored with an AWS console without much trouble.
How to recover?
There are different ways to recover your instance private key. When you log in to the console of your EC2 instance, you can right-click and connect in different alternative ways.
Scenario
SSH client is the most used to directly connect your instance remotely from any computer, and because we lost the private key - we can’t use this anymore. There are other ways like Session Manager and EC2 serial console, which will be a little complicated for this guide so we skip it.
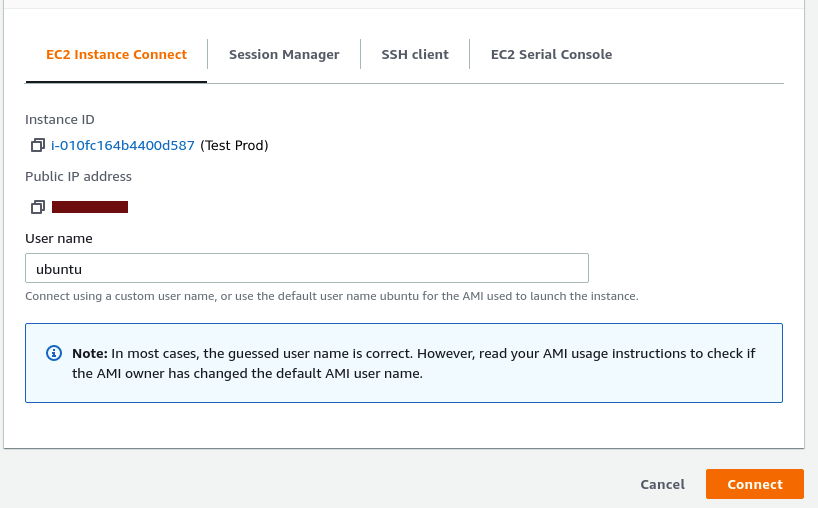
However, one possible way out is to use EC2 Instance Connect directly from a web browser.
Instance Connect
If you are an admin or have privileges to add a policy to IAM users, simply add AmazonConnect_FullAccess permission for your group. You click connect and you are inside your server.
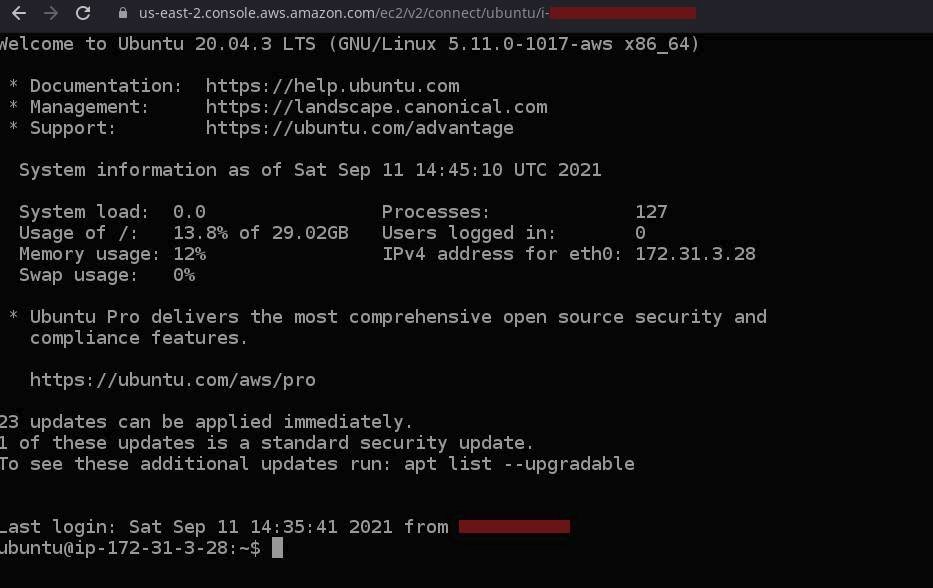
Next create a new private key and use this from now.
Sometimes cases are not so simple and user cannot access other options due to lack of permission for the role or some services like EC2 connect is not available for certain regions.
Manual recover - the hard way
The current running instance has to be selected and stopped before proceeding forward - the standard way. We can also keep it as a running state if it’s a test server or no users/low loads are in this server.
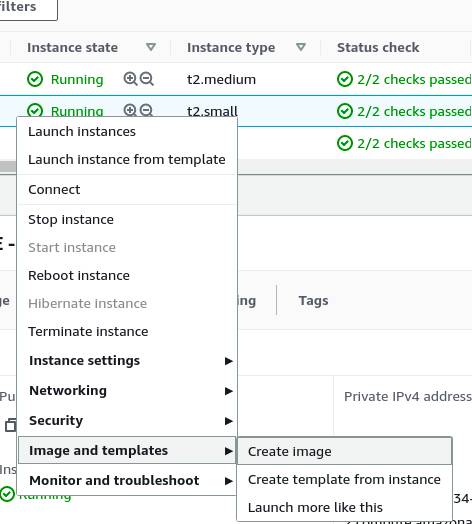
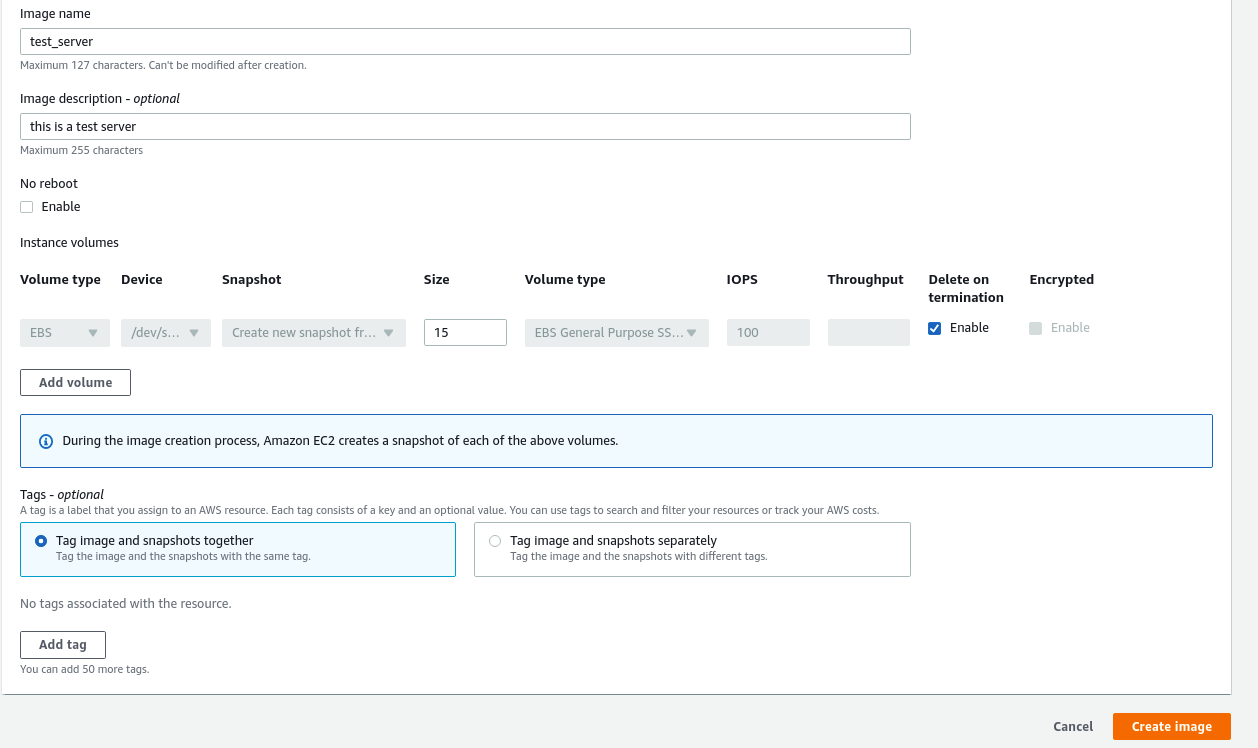
Next, click create an image (the current is already selected) by adding a name, description. It will take some time to clone the image from the current instance, when it’s done you can view it under Images > AIM section.
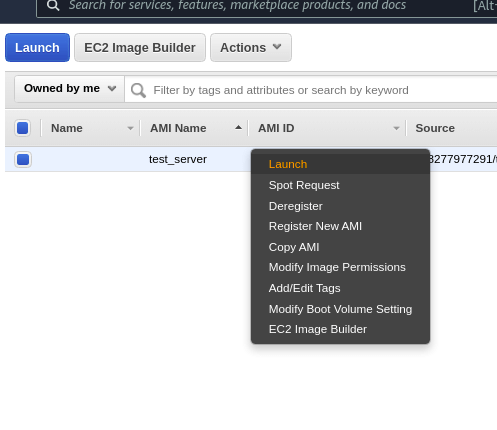
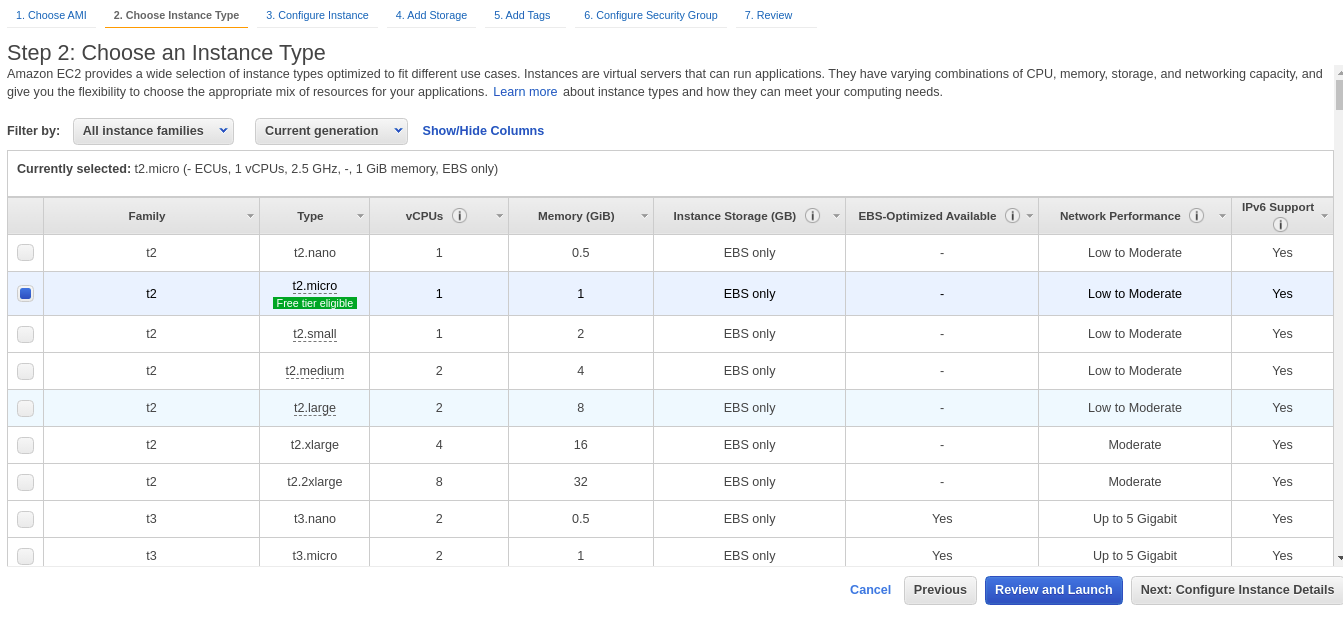
You need to select your just created Image and click the launch instance button. The new page will be opened and the AIM image will be autoselected, click next. On this page you need to review our instance size and other configuration, you can click review and lunch if you want to keep it as previous instance settings.
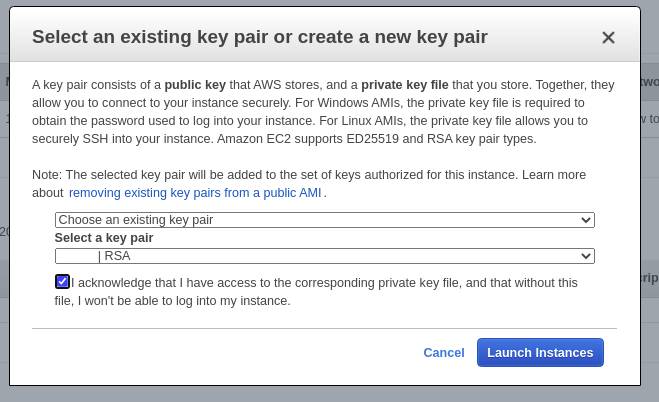
Finally, a new window will pop up and ask you to either select the old key pair or add a new one. If you have access to the private key but it got replaced, you can keep using an old key. Likewise, if you don’t have access to the old keys - you need to create new SSH key pair and click on lunch instances. It will take a couple of minutes to start the new instance when it is done you will be able to view it in the Instance list. At this point, the restoration is almost completed.
Change old instance elastic IP
You need to connect to the remote instance and a static IP is essential to do this as you already know. We replaced the instance by following the above method but the IP is still pointing to the old server and we need to change it if you still want to keep the service intact as previously working. For me, I want to be able to use the same previous private key and IP so my team members don’t have to change anything.
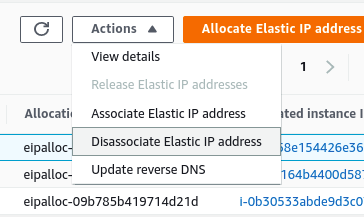
Go to the Elastic IP page and you should be able to see the old instance IP, right-click and disassociate the elastic IP from that instance. Once this is done. Select the new instance and click allocate elastic Ip address, you should be able to change the IP. That’s all.
At last
Congratulation, you just learned how to recover an instance that is almost unusable to fully working intact with previous configurations. This is one way I recover it with the available feature available during writing this guide. Please leave a comment if you need help or suggestions.
Leave a comment